Appearance
Outputs
Introduction
Outputs are what allow you to specify which users get which scenes and events. They give name to the where and what of a user. E.g. "on a phone; in Europe". By tying scenes and events to outputs, you declare that these will only show if the user is on one of those outputs.
You can configure outputs to turn on/off automatically given a set of conditions, or always on by hard-coding it into the URL.
Studio
Configuration
Go to the Outputs section under Settings to setup your outputs.
To create an output, only a name is required, but to make full use of outputs, conditions is where its true power lies.
Conditions
With this feature enabled, you can set up conditions to automatically turn the output on/off. One row represents one condition, and compares the value of a given data property with that of another, or a directly inputted value.
A single output can contain any number of conditions. It can be as simple as "user is watching on a phone; in portrait mode", or infinitely more complex. Any data properties you set up in your application – including Parameters and Bridge – is available to compare with.

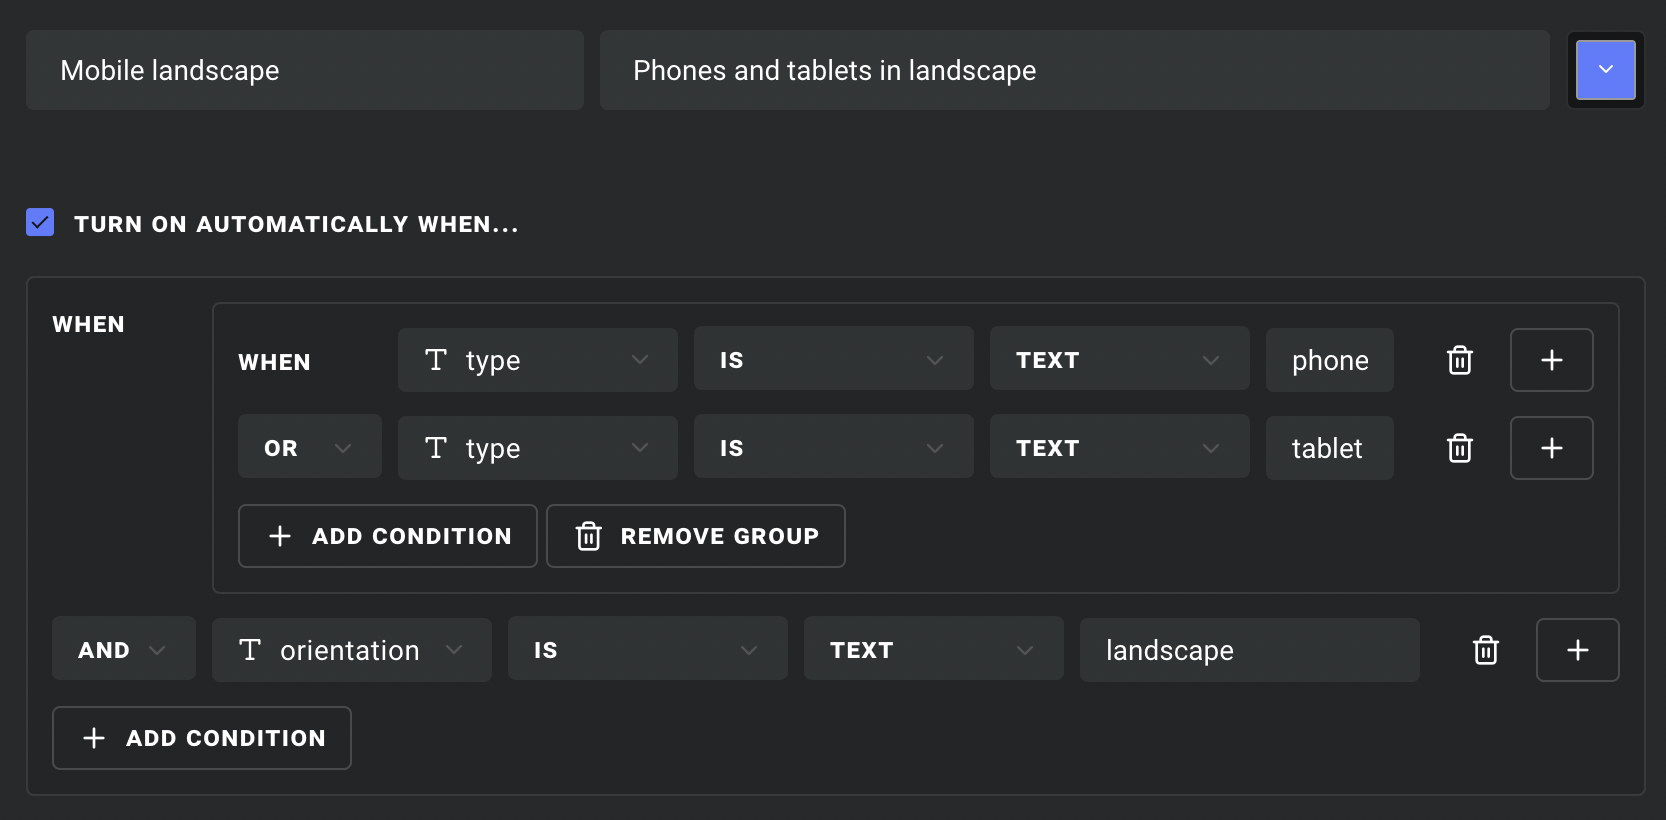
The interface might seem complex at first, so it could help to read it like a sentence:
"When X is A, and Y is B, turn output on".
AND and OR
The relationship between a list of conditions is determined by the logical AND or OR.
AND— all conditions on the same level need to pass.OR— just one of them needs to pass.

If you need to mix AND and OR (e.g. (phone OR tablet) AND landscape), you will need to separate them into different groups. Jump to Condition groups for how to do this.
Inputs
To make any comparison, you must first choose which value to compare with (i.e. the source input), using the data picker.

The types of inputs you can compare the source input to depends on both the source input and the type of comparison you choose. Picking a data property to compare with, is always an option.
Comparisons
To make a comparison, you have to pick the source input. After doing so, the list of available comparisons, for the type of value you selected, will update. For a boolean (true/false) input, this is limited to is and is not.
Examples


Comparison types
Following is a full list of all the comparison types – some of which only appear for inputs of a certain type.
is— the two inputs are equal.is not— the inputs to differ.is empty— the input has no content.is not empty— the input has content.includes— the first input contains the value of the second input.excludes— does not contain the value of the second input.
Condition groups
The relationship between conditions, within a single level, can only be either AND or OR. The reason for this limitation is to reduce complexity and avoid confusion. To achieve expressions like (X or Y) and Z, you will need to group conditions with the same logical operator, in this way:
- Click the
+button at the end of a condition row to expand it into a group. - Pick the logical operator (
ANDorOR) for the group. - Add any number of conditions to the group directly below it.
Collapsing groups
To collapse/flatten a group, you will need to remove all the conditions, either by clicking Remove group, or removing them individually, then you will need to re-add them without grouping.
Scene outputs
Use the output dropdown in the inspector to limit a scene to the desired outputs.

If a scene is triggered by a specific event source, under Triggers in the inspector, it might make more sense to limit outputs for the event source instead. See the next section for how to do this.
Sometimes, you may wish to have separate outputs for scenes and events. However, if the event is already limited to the same outputs, you can safely remove these from the scene.
Event source outputs
To limit all events that belong to an Event Source to specific outputs, use the output dropdown in the inspector.

If you wish to select specific outputs for individual events, see the Event Outputs section.
Dynamic outputs and events
A current limitation with the event system is that, once a user has received an event, they cannot unreceive it, unless the Ease Live view is reloaded.
Preview
You can test scene outputs in Preview. Use the output dropdown, or toggle them directly in the scene list by clicking the output circles.

Circles for outputs that are selected (turned on) in the list will appear larger.
Visibility
If a scene is set to be invisible by design, this will override any other visibility checks – including Outputs.
Cockpit
Event outputs
If you wish to set the outputs for a single event, instead of the entire Event Source, you can use the output dropdown in the event editor in Cockpit.
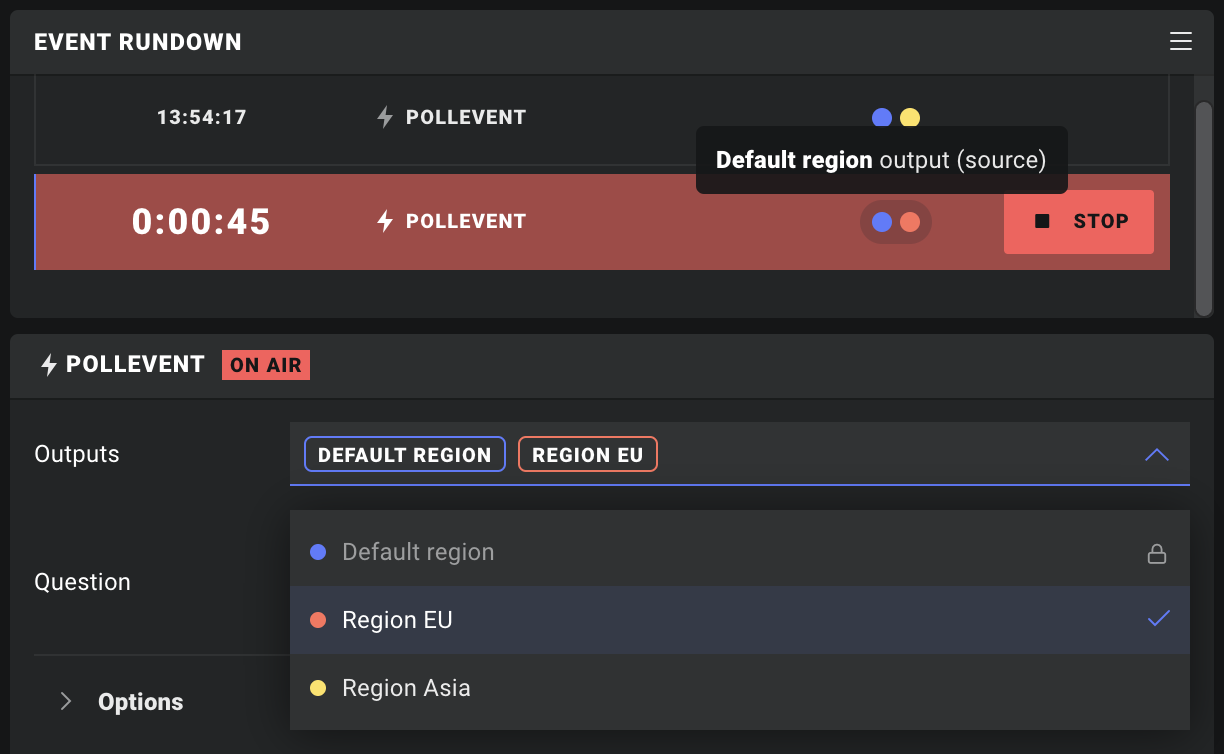
Outputs configured for the entire Event Source will show up as pre-selected, and can only be removed in Studio.
Dynamic outputs and events
A current limitation with the event system is that, once a user has received an event, they cannot unreceive it, unless the Ease Live view is reloaded.
Live and Preview
To see your application filtered by specific outputs, use the output dropdown in the headers of the Live and Preview windows.

Output URL
Hard-coded versus dynamic outputs
It is generally recommended to use Conditions, to dynamically determine the state of an output, over hard-coding it into the URL. Especially if the URL is hard-coded into the application that uses it. This is because any changes to the URL could require a new build and deployment of the parent application.
Outputs are represented by their unique IDs in the URL – not their names. Thus removal of one of these outputs in Studio, and adding a new one with the same name, will still result in a change to the URL.
To create a URL for specific outputs, use the output dropdown in the Live view. Once the outputs you wish to include in the URL are selected, click URL button next to the dropdown. This opens a dialog that gives you the generated URL and show you which outputs are included.

See the Integrate section for how to use this URL.
Example
Click this link to see Outputs in action.
In this project, there are two scenes tied to two different outputs – Landscape and Portrait – activated depending on the value of orientation in the Bridge data source. This value will be either landscape or portrait.

Once in Play, try changing the orientation using the device controls, or by rotating your phone/tablet, to trigger the outputs and see the scenes change.

Non-native orientation
If the device does not support native orientation, but the Ease Live view can be resized (e.g. in a browser), the size of the view will determine the orientation. I.e. a greater height than width will result in portrait orientation.