Appearance
Functions
Functions allow you to harness the full power of JavaScript to solve advanced use cases. You can write them directly in the functions modal, or import them from a URL.
Writing a function
TIP
Functions are written in JavaScript. This guide assumes that you already know JavaScript, although we will give some useful examples that should make sense even if you are new to it.
The button to open the functions modal is next to the help button in the top bar. Here, we have already added our first function:
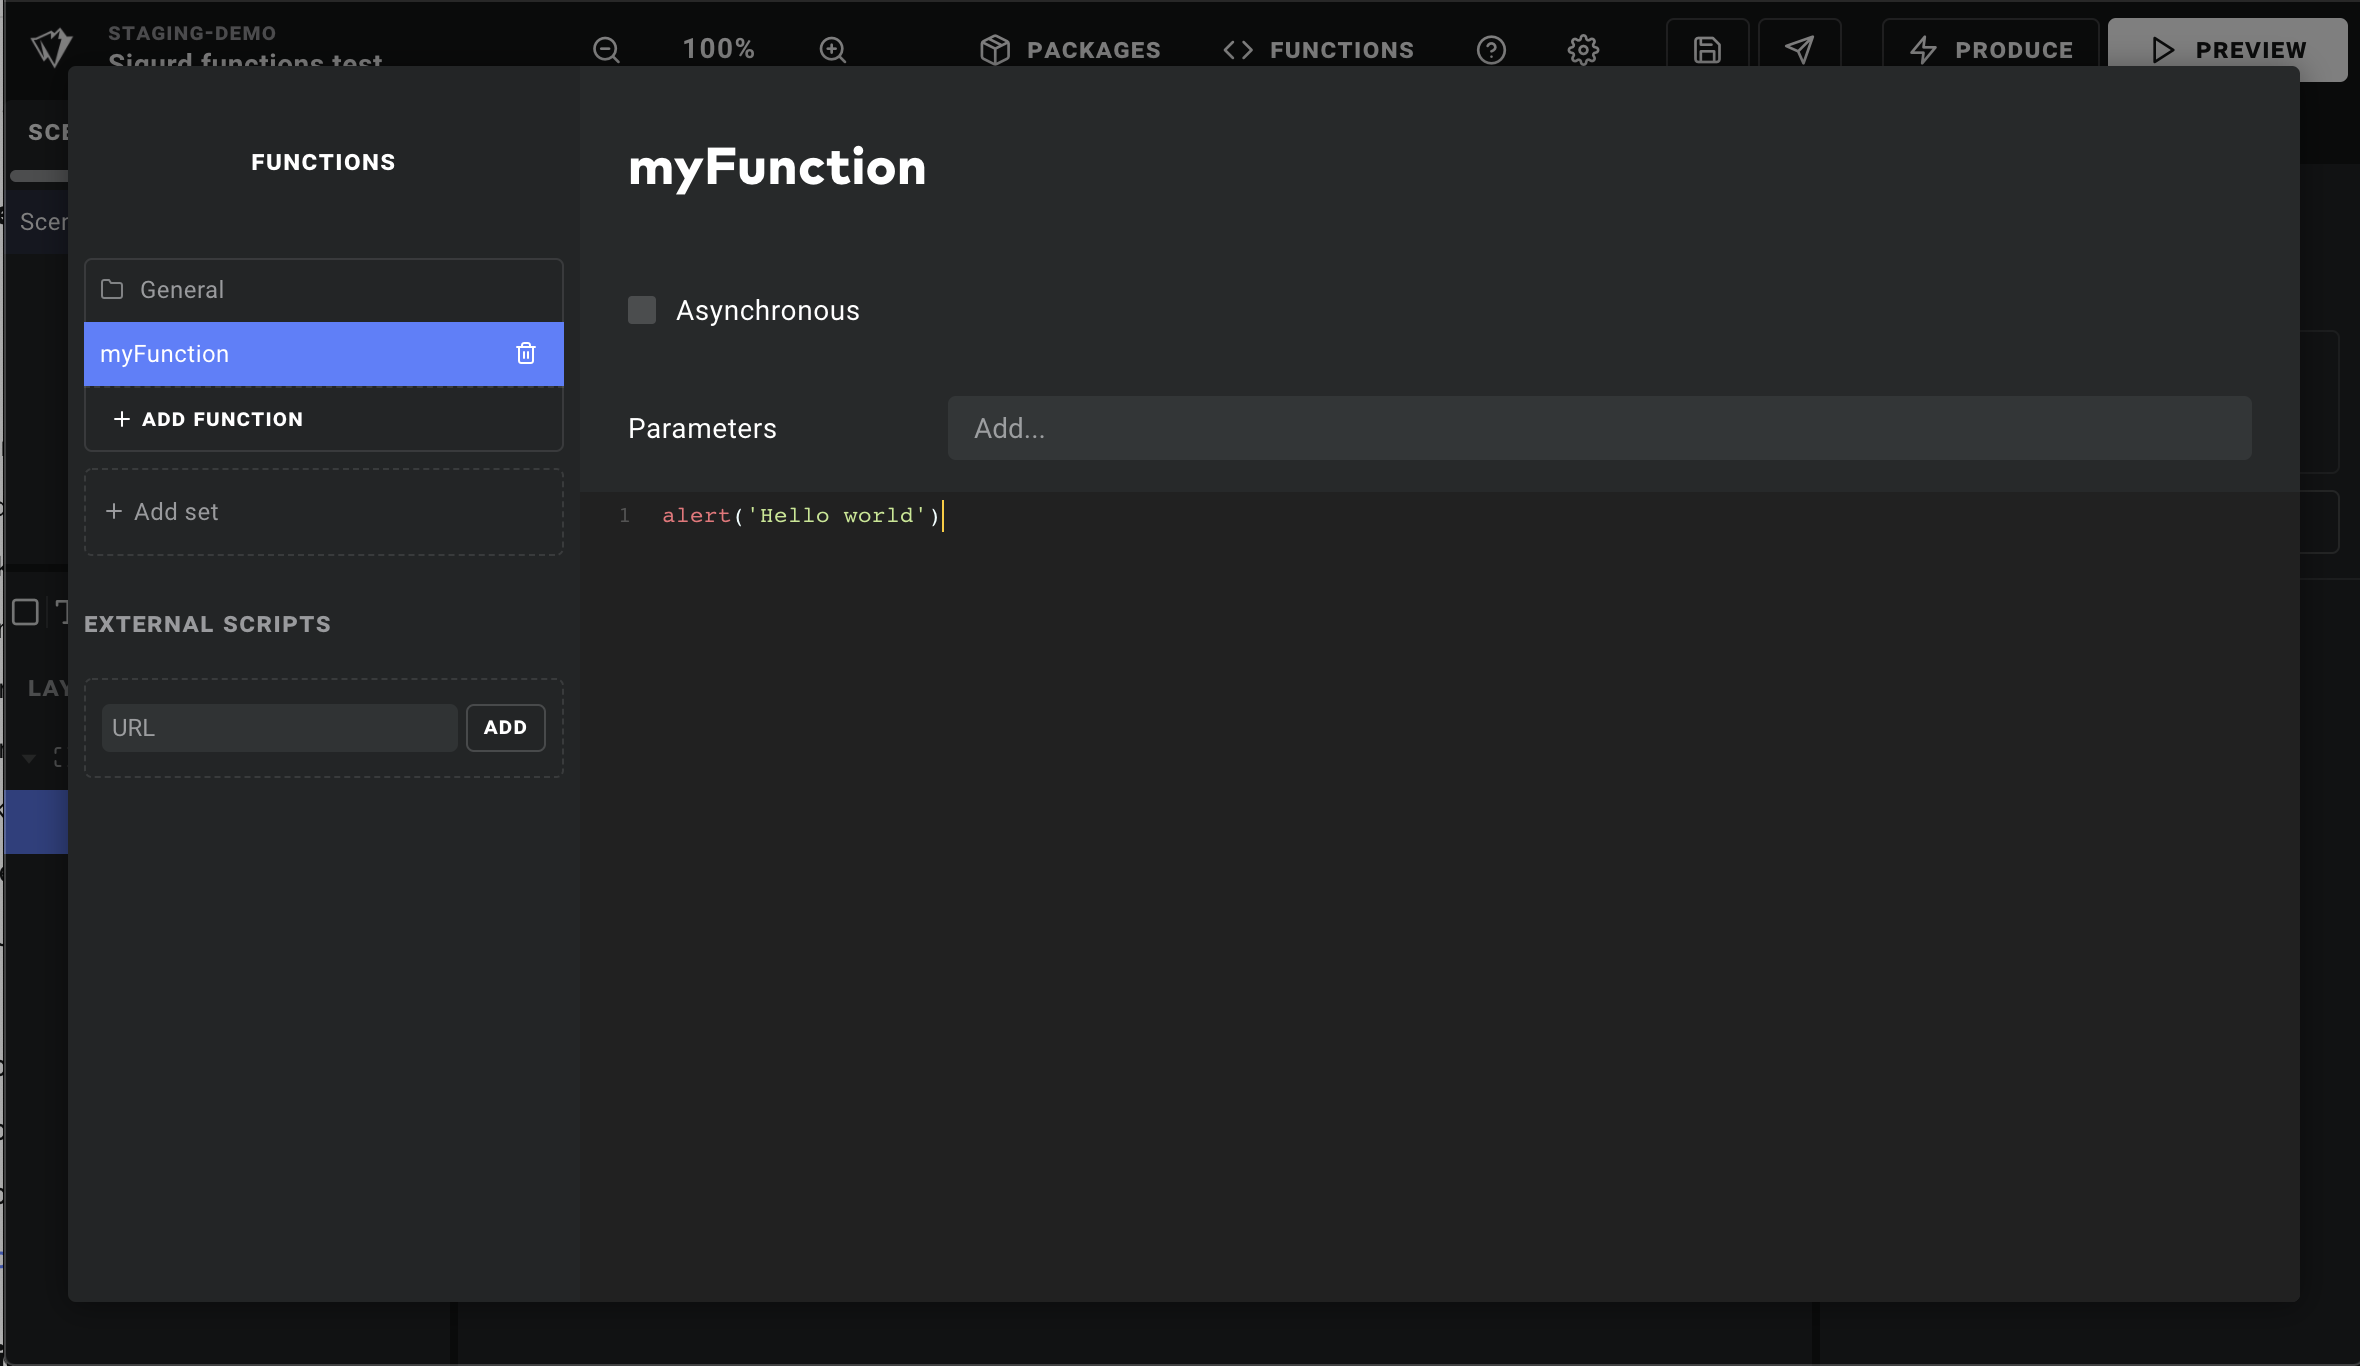
As you can see, we only write the function body in the code view. To make it an async function, enable it with the checkbox at the top.
To add a parameter to your function, type it into the "Parameters" field and hit Enter. Any parameters you add will have corresponding input fields when you call your function via a trigger. And, as with almost any input field, you can add data overrides to pass values from a data sources.
TIP
To help keep complex projects tidy, functions are organized into sets. New projects are created with a default set called "General" — if you wish to give it a different name, just double click it.
The function context
It is important to note that functions are not sandboxed. This is to ensure you have access to everything you would normally have when writing JS applications — things like setTimeout or awaitAnimationFrame for example.
In addition to everything you will normally find in the window context, functions have access to a global context variable that includes the following:
javascript
const {
  device, // The user's device size and orientation
  player, // The video player state, when using our SDK
  account, // Things like your Ease Live account's server URL
  actions, // Any action you can fire via a trigger
  sources, // Your data sources
  application, // The entire application object (layers etc)
  functions, // Call other functions
} = context;
Calling other functions
To call another function, access it via context.functions.setName.functionName() and pass it parameters as you normally would. For example, if you have a logMessage function with the parameters message and color, you might call it like this:
javascript
const { General } = context.functions;
General.logMessage("Hello!", "violet");
Setting data from a function
In most cases, data properties are added to data sources via the Studio UI. To set their values from a function, simply assign data the same way you would any other variable:
javascript
context.sources.mySource.myProperty = "Some text";But sometimes you want to dynamically create a property, like a player ID to hold some metadata for the current game. In order for that property to be reactive — meaning other computed data will react to it and its changes — you need to use the context.reactiveSet() helper function. For example:
javascript
const { sources, reactiveSet } = context;

reactiveSet(sources.playerStats, "Player-ID-123", {
  points: 39,
  rebounds: 10,
});
Voilà! That property is now reactive, and can be referenced in computeds like any other data property. In this case: context.sources.playerStats["Player-ID-123"].
Triggering actions from functions
The actions object gives you direct access to the same functions that are fired by normal triggers.
A common example is to trigger a timeline animation:
javascript
// Find the scene you want to animate:
const scene = context.application.children.find(
  (c) => c.name === "Score" && c.type === "scene"
);

// Pass the scene ID and timeline name like so:
context.actions.playTimeline({
  data: {
    target: scene.id,
    timeline: "Pop home score",
  },
});
A more convenient, and properly documented, API is underway. In the meantime, you can list all of the actions available to you by simply calling console.log(context.actions) in one of your functions.
External functions
Ease Live also lets you load scripts from any URL, by simply pasting them into the URL field under "External scripts". Any functions exported by that file will be listed, and you can specify parameters from them as needed.
The primary use case for external functions is to load utilities or libraries that you control and host yourself somewhere. It is not recommended to load third party libraries directly from a CDN, for example. However, external files can also be useful during development; whether you are serving a file locally so you can work on it from the comfort of your IDE, or quickly hooking up a third party library like three.js — which brings us to our next topic: canvas layers.
DANGER
Again, note that functions are not sandboxed. They have access to the entire global context. As always with JavaScript, never load scripts from a source you cannot trust as this would pose a major security risk.
Canvas layers
While Ease Live strives to meet all your interactive broadcast graphics needs out of the box, you may find cases where you want more flexibility, or performance, than normal web elements can give you.
Enter the canvas layer. If you have HTML/JS experience, it is exactly what it sounds like: a layer that contains an HTML canvas element.
If you have never worked with an HTML canvas, or just need to brush up, the MDN canvas tutorial is an excellent place to start. Put simply, it is a blank slate of pixels that you can use to render anything you want, using JavaScript. Some popular libraries that you could use with canvas layers are lottie, pixi.js and three.js.
How they work
When you add a canvas layer to your scene, you will see these three fields in its property inspector:
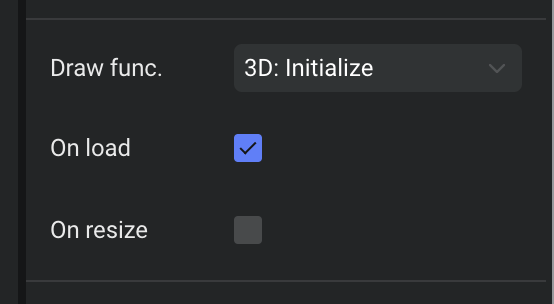
The draw function is how you get access to the canvas element. Here, we have created and selected a function named "3D: Initialize". It receives the canvas element as its first argument, and the canvas layer node as its second.
Triggering the draw function can be done automatically on load (the first checkbox), and when the window resizes (the second checkbox). Additionally, you can call it from any normal trigger: just look for "General -> Draw canvas".
A quick example
If you are drawing without the help of a library you will often find yourself with some generic boilerplate that includes this:
javascript
/* (1) Get the drawing context and device resolution */
const ctx = canvas.getContext('2d');
const resolution = window.devicePixelRatio;

/* (2) Scale your canvas to match the screen resolution */
canvas.width = canvas.offsetWidth * resolution;
canvas.height = canvas.offsetHeight * resolution;
ctx.scale(resolution, resolution);

/* (3a) Draw something directly... */

ctx.fillStyle = '#FFF';
ctx.beginPath();
...
ctx.fill();

/* (3b) ...OR create an animation */

const draw = () => {
  // You usually want to stop the animation when the layer or scene is hidden:
  if (!document.body.contains(canvas)) return;
  ...
  requestAnimationFrame(draw);
}

requestAnimationFrame(draw);
For a specific example, let's create this quick sine wave animation:
Not necessarily very useful, but it is enough to illustrate how canvas layers work. To see it in your project, simply:
- Create a new function, and add a parameter called
canvas - Copy and paste the below snippet
- Create a new canvas layer, about 360 x 80 in size.
- In the property inspector, pick your function as the "Draw function" and activate "On load".
Here is the snippet:
javascript
// Grab the drawing context and some useful values
const ctx = canvas.getContext("2d");
const w = canvas.offsetWidth;
const h = canvas.offsetHeight;
const dpr = window.devicePixelRatio;

const dots = 16;
const radius = 2;
const diameter = radius * 2;
const middle = h / 2;
const spacing = w / dots;

// Use device resolution and pick a color
canvas.width = w * dpr;
canvas.height = h * dpr;
ctx.scale(dpr, dpr);
ctx.fillStyle = "#9B10FF";

// This nested function actually draws each frame
const draw = (timestamp) => {
  if (!document.body.contains(canvas)) return;

  ctx.clearRect(0, 0, canvas.width, canvas.height);

  const dotOffset = timestamp / 40;
  const waveOffset = timestamp / 720;

  for (let i = 0; i < dots; i++) {
    const x = (dotOffset + spacing * i) % w;

    const radians = waveOffset + (Math.PI * 4 * x) / w;
    const y = (middle - diameter) * Math.sin(radians);

    ctx.beginPath();
    ctx.arc(Math.round(x), Math.round(y + middle), radius, 0, 2 * Math.PI);
    ctx.fill();
  }

  // Next frame
  requestAnimationFrame(draw);
};

// Draw first frame
requestAnimationFrame(draw);
Voila! As you can see, most of that was generic canvas drawing boilerplate. The actual code needed to animate that curve is relatively simple, and barely scratches the surface of what the canvas layer can do.
And remember that if a function gets hard to manage, you can always move some of it out into separate functions — for example passing the canvas ctx to drawing utilities that perform drawing operations: functions.myCanvas.drawKitten(ctx, x, y, size).