Appearance
5. Working with data
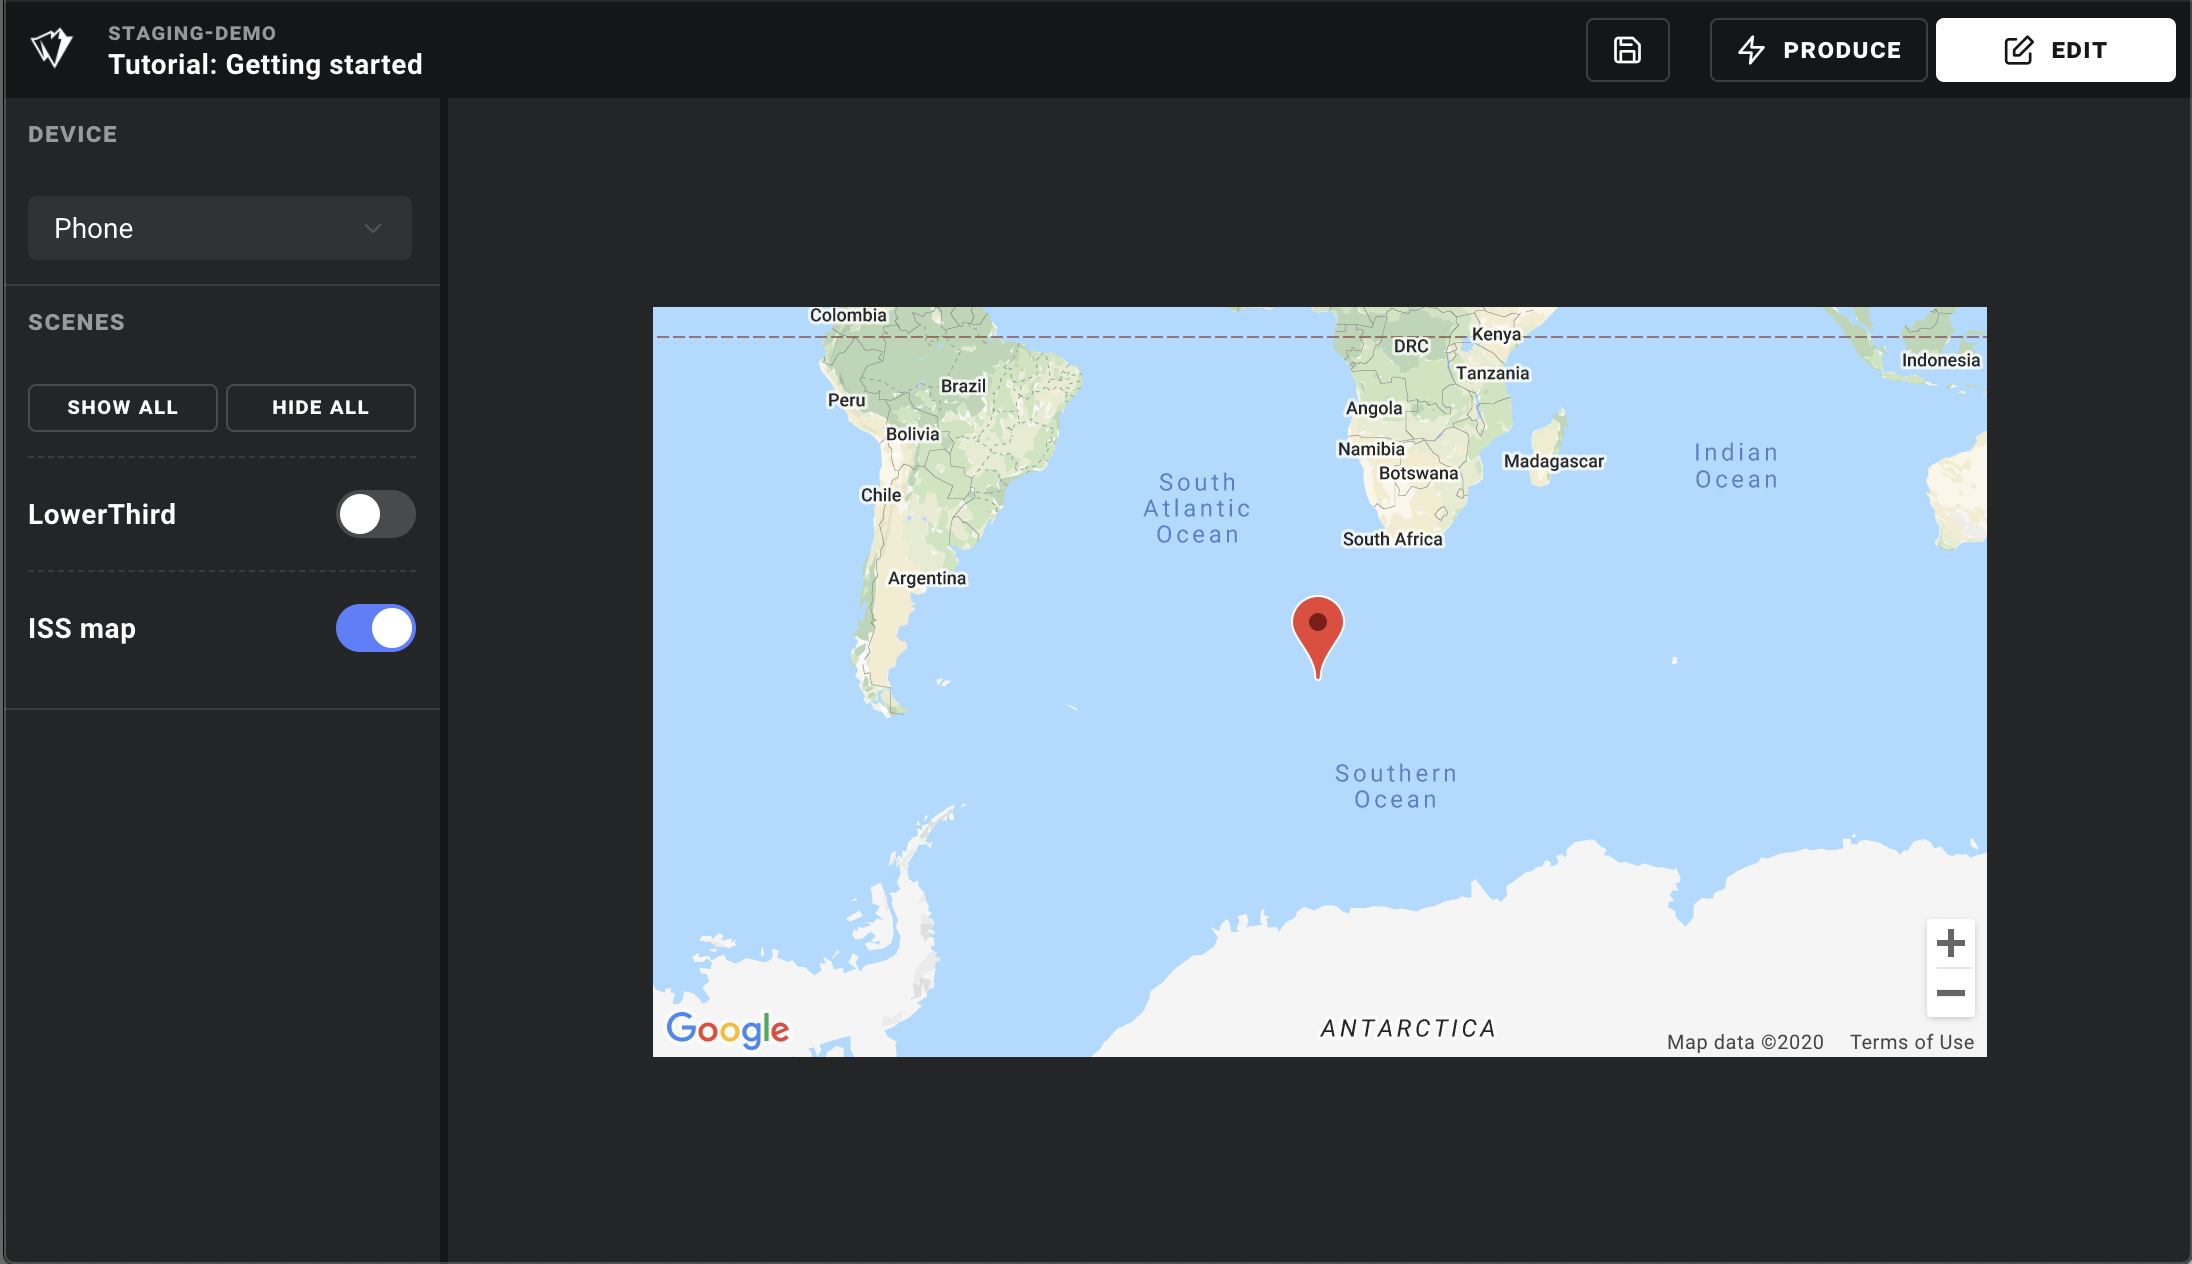
Data sources are an extremely powerful feature of Ease Live. They allow your UI to communicate with APIs, respond to device sizes, and much more. To illustrate a couple core concepts, let's hook up a Google map that shows the live position of the ISS:
Step 1: Configure our API call
Setting up an API as a data source could not be simpler. Simply go to the DATA tab, create a new source, and pick API as the source type. For our example we will use this URL to get the live position of the ISS:
https://cors-anywhere.herokuapp.com/http://api.open-notify.org/iss-now.json
Just paste that into the URL field, leaving "Method" as is and making sure "Auto fetch" is checked:
Finally, just like for events we need to specify which data properties we will receive. For API sources to work, the data properties need to match what is returned by the API. But to make your life easier, the GENERATE button will do that for you. Just click it, and you should see something like this in the PROPERTIES panel to the left:
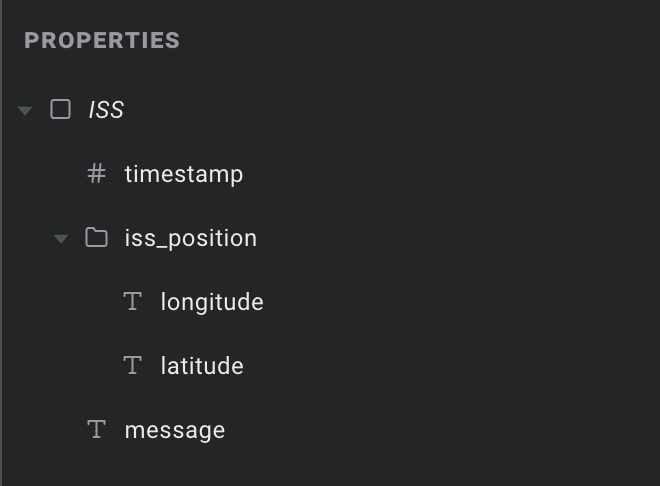
Great! We could now delete any properties we aren't planning on using, but we will just leave it as is for now.
Step 2: Our first computed property
For our map layer, we are going to need the longitude and latitude combined into a single text property to hook up to its "Position" field. This is where a computed property comes in handy.
They use JavaScript to let you output values based on all kinds of things – other properties, other data sources, device details, etc. They also come with lots of handy utilities at your disposal, for things like rounding numbers, converting between units, and modifying text. For more details on everything you can do, please check our dedicated guide:
Data source: Computed properties
For now, we will just add a computed property, call it coordinates, and enter the following JavaScript in the right column:
jsx
const { latitude, longitude } = context.data.iss_position;

if (latitude && longitude) return latitude + ',' + longitude;
else return '';
Even if you are not familiar with JavaScript, hopefully the above makes some sense. All we are doing is grabbing the latitude and longitude values from the same data source (accessed via context.data), and spitting out a single comma separated value – ala 59.000,8.000.
Step 3: Hooking it up to a map
Now that we have our coordinates ready to go, let's simply create a new scene and add a map layer. We probably want a fairly wide zoom, and let's hide some of the buttons to reduce the clutter:
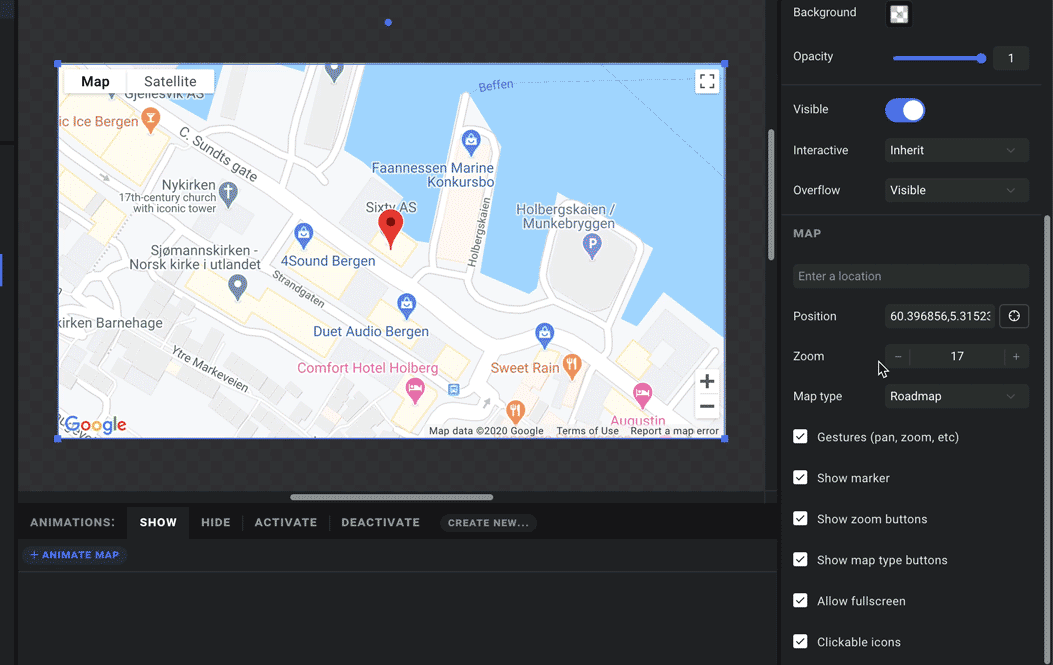
Now all we need to do is click the data icon next to the Position field, and find our coordinates property. That's it – simply click the preview button, and you have a fully functional ISS tracker in Ease Live 🚀
If you are feeling adventurous, at this point you could add a button for opening and closing the map, or a timer to refresh the API data every few seconds – just add a timer layer with a "load data" trigger.